Replacing old carpet with new can be a great way to freshen up your home’s look and feel. However, removing and installing carpet can seem like a daunting task. In this blog post, we’ll guide you through the process of removing and installing carpet, step by step.
Removing Carpet
Before you can install new carpet, you’ll need to remove the old carpet first. Here’s how:
- Clear the room: Remove all furniture and other items from the room.
- Cut the old carpet: Use a utility knife to cut the old carpet into manageable strips. Roll up each strip as you go.
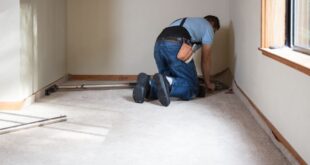
- Remove the old carpet and padding: Once you’ve cut the old carpet into strips, pull up each strip and remove the padding underneath.
- Remove tack strips: Tack strips are located along the perimeter of the room and hold the carpet in place. Use a pry bar and hammer to remove the tack strips. Be careful not to damage the subfloor.
- Remove any remaining staples: After removing the old carpet and padding, there may be staples left in the subfloor. Use pliers or a staple remover to remove any remaining staples.
w
Once you’ve removed the old carpet and prepared the subfloor, it’s time to install the new carpet. Here’s how:
- Measure the room: Measure the length and width of the room to determine how much carpet you’ll need. Add an extra 10% to account for cuts and waste.
- Install tack strips: Place new tack strips along the perimeter of the room, leaving a gap between the wall and the strip that’s the same as the carpet’s thickness.
- Install padding: Cut and install the carpet padding, making sure to overlap any seams by a few inches. Staple the padding to the subfloor, but be careful not to staple through the tack strips.
- Cut the carpet: Use a carpet knife and a straightedge to cut the carpet to fit the room, leaving an extra 3-4 inches on each side.
- Install the carpet: Starting at one end of the room, place the edge of the carpet against the wall and press it into the tack strip. Work your way around the room, using a knee kicker or power stretcher to stretch the carpet and press it into the tack strips.
- Trim excess carpet: Once the carpet is in place, use a carpet knife to trim the excess along the walls.
- Finish the edges: Install transition strips where the carpet meets other flooring types, such as tile or hardwood.
Congratulations! You’ve successfully removed and installed new carpet. Enjoy your newly refreshed space!
In conclusion, removing and installing carpet can be a time-consuming task, but with the right tools and a little bit of patience, it can be done. If you’re unsure about any aspect of the process, it’s always best to consult with a professional carpet installer to ensure the job is done correctly.